# Adding eID
> eID allows you to authenticate users with eID processes provided by organizations in the European Union. Click here to learn more about how to add eID authentication to your flows.
# Adding eID authentication to your documents
## Setup
| Steps | Images |
| --------------------------------------------------------------------------------------------------------------------------------------------------------------------------------------------------------------------- | -------------------------------------------------------------------------------------------------------------------------------------------------------------- |
| 1. Open the `Admin Console` from the user menu in the Dropbox Sign web page. | 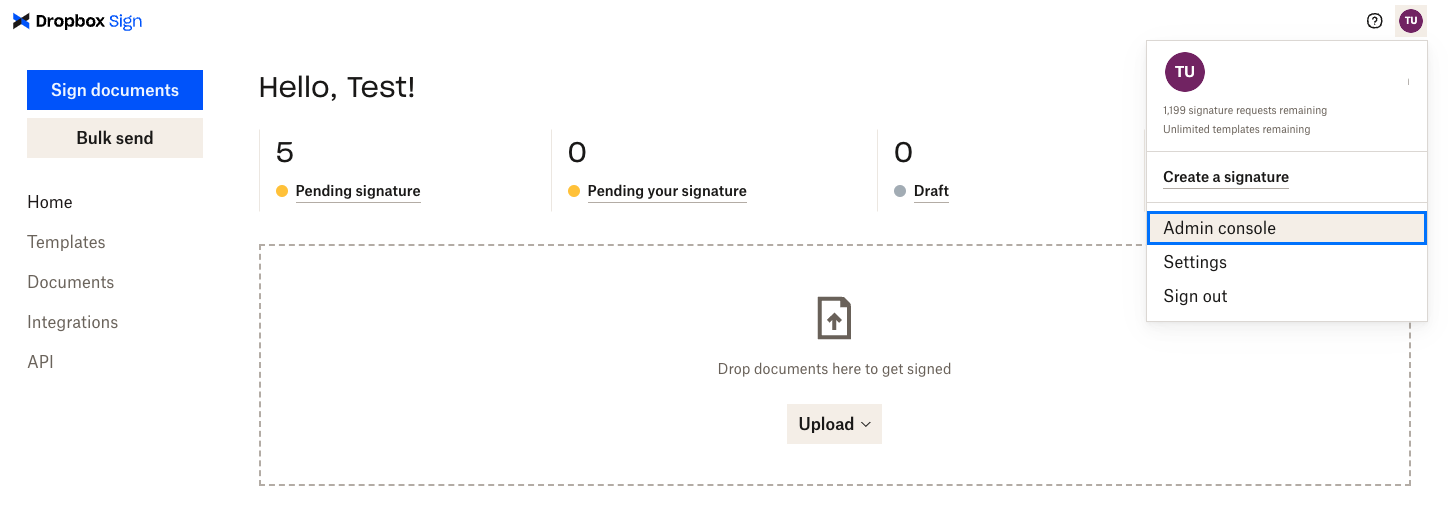 |
| 2. In the `Admin Console`, navigate to the `Signature requests` subsection of the `Settings` section. In the `Signature Request Options` subsection of the `Signature requests` section, navigate to the `eID` entry. |
|
| 2. In the `Admin Console`, navigate to the `Signature requests` subsection of the `Settings` section. In the `Signature Request Options` subsection of the `Signature requests` section, navigate to the `eID` entry. | 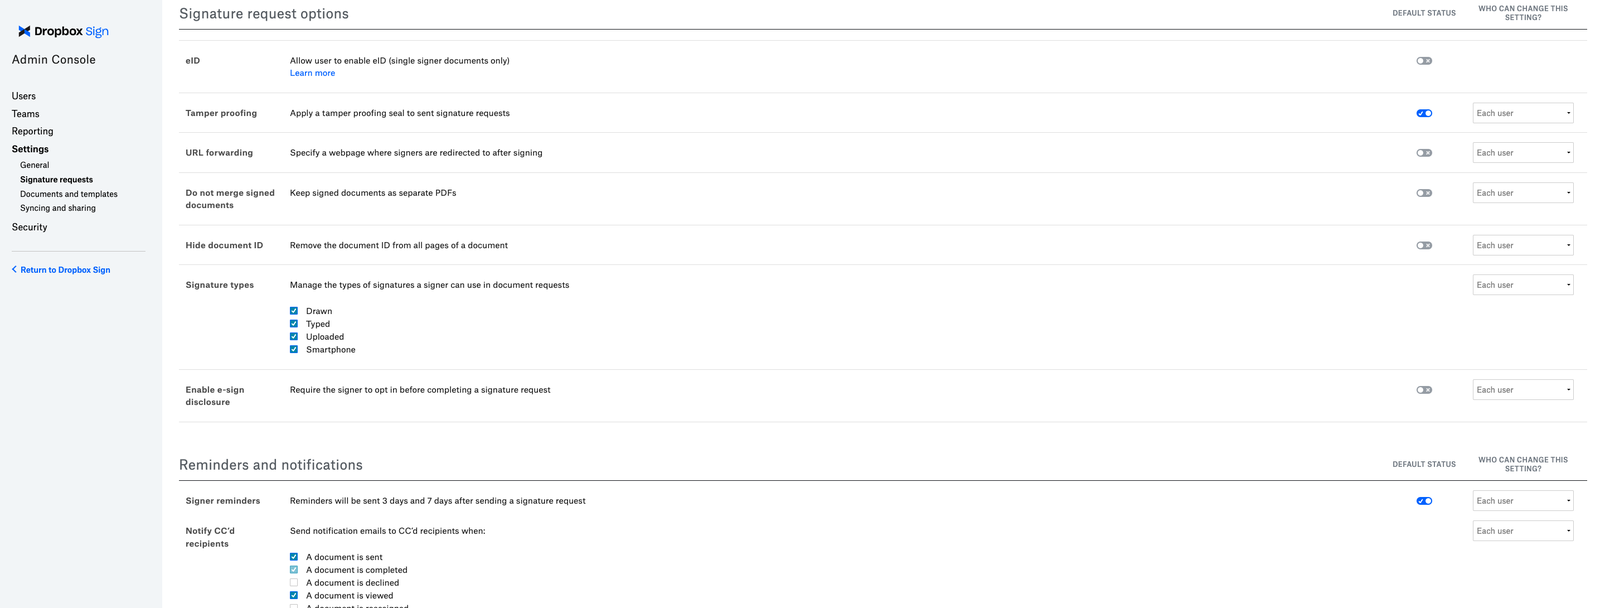 |
| 3. Activate eID authentication by selecting the switch control. Confirm your choice on the popup modal. |
|
| 3. Activate eID authentication by selecting the switch control. Confirm your choice on the popup modal. | 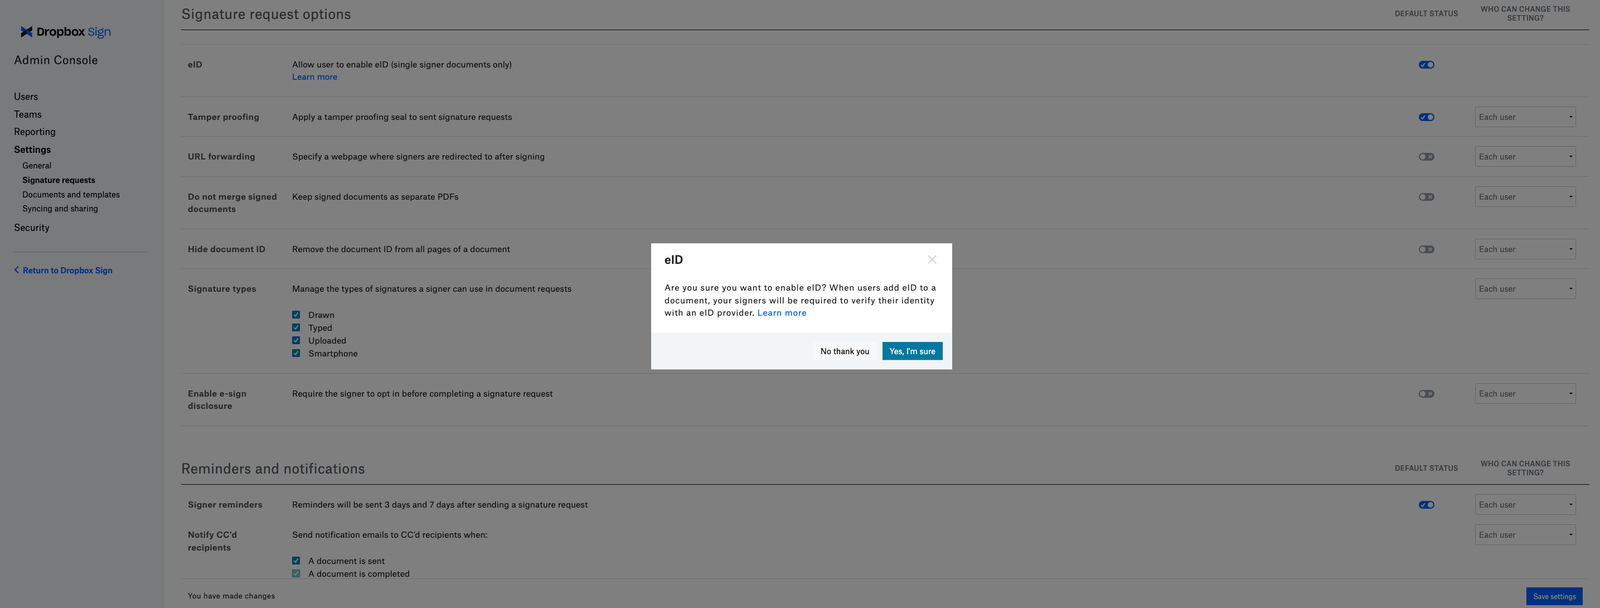 |
| 4. If the activation is successful, a confirmation will appear at the top of the page |
|
| 4. If the activation is successful, a confirmation will appear at the top of the page | 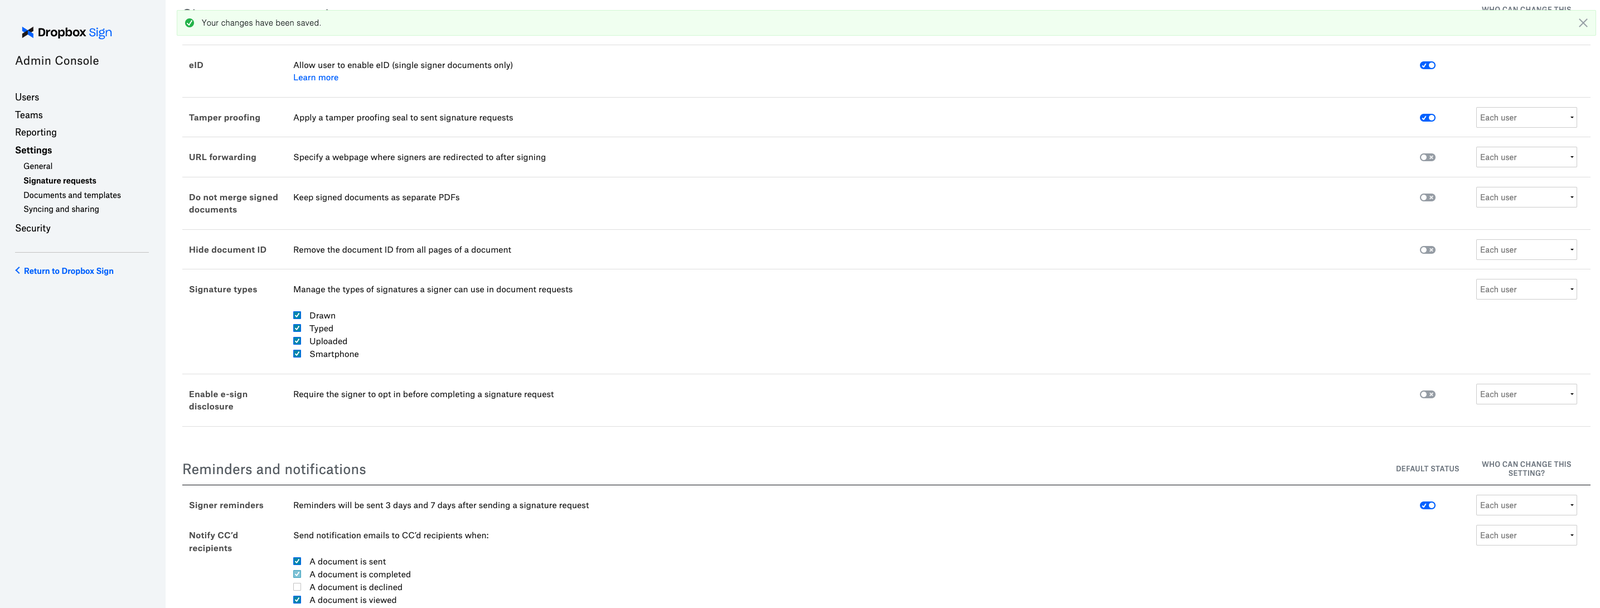 |
Reminder: eID authentication requires a per-request subscription. If needed, contact API support to change your subscription.
## Dropbox Sign Website
| Steps | Images |
| --------------------------------------------------------------------------------------------------------- | --------------------------------------------------------------------------------------------------------------------------------------------------------------- |
| 1. When the Sender is assigning a Signer, the option to "Enable eID" will be present. Check the checkbox. |
|
Reminder: eID authentication requires a per-request subscription. If needed, contact API support to change your subscription.
## Dropbox Sign Website
| Steps | Images |
| --------------------------------------------------------------------------------------------------------- | --------------------------------------------------------------------------------------------------------------------------------------------------------------- |
| 1. When the Sender is assigning a Signer, the option to "Enable eID" will be present. Check the checkbox. | 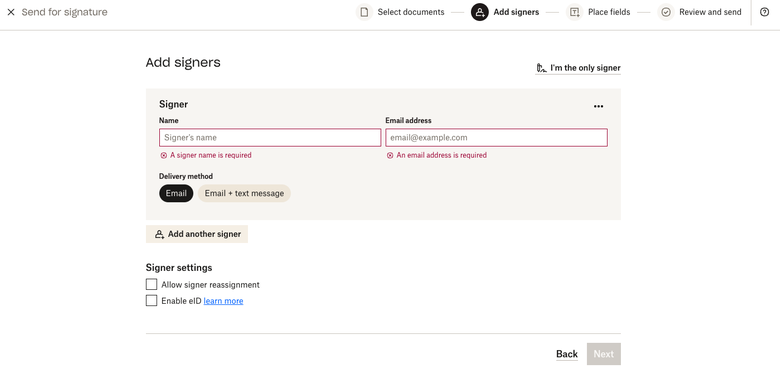 |
| 1. Confirm in the modal that eID should be enabled for this request |
|
| 1. Confirm in the modal that eID should be enabled for this request | 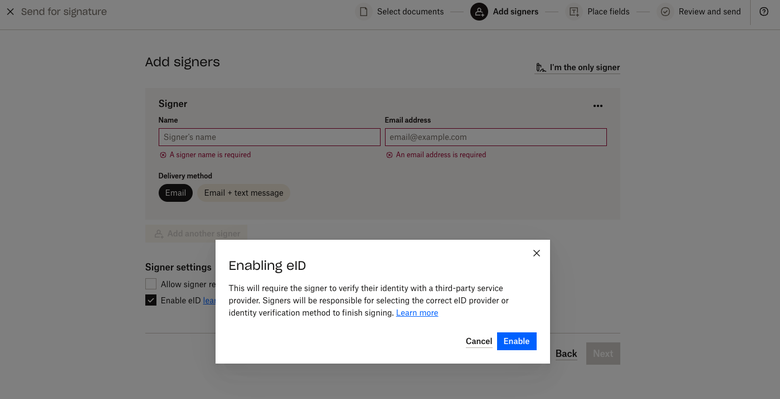 |
Please note that:
* When eID is enabled, the request can only be sent to one signer. Therefore, the signer cannot be re-ordered or reassigned.
* The Sender will get confirmation modal. Click "Enable" to confirm that eID will be required for this document.
## API
### Non-embedded
| Steps | Images |
| -------------------------------------------------------- | ------ |
| 1. Add `is_eid` on your request, with a value of `true`. | |
Supported endpoints:
* [Send Signature Request](/api/signature-request/send)
* [Send with Template](/api/signature-request/send-with-template)
### Embedded
| Steps | Images |
| ---------------------------------------------------------------------------------------------------------------------------------------------------- | ------ |
| 1. Set up an embedded request. See the [embedded request walkthrough](/docs/walkthroughs/embedded-requesting) for details. | |
| 2. When sending the initial API request, set the value of the `force_signer_roles` to `true`. This will enable the requester to see the signer step. | |
| 3. Inside the embedded iFrame, follow the instructions in the "Dropbox Sign Website" section above to enable eID. | |
| Supported endpoints: | |
* [Create Embedded Unclaimed Draft](/api/unclaimed-draft/create-embedded)
* [Embed Unclaimed Draft with Template](/api/unclaimed-draft/create-embedded-with-template)
Please note that:
* Using eID authentication on the API still only allows one signer.
* eID authentication cannot be used in `test_mode`.
* eID authentication does not support Embedded Signing. The Enable eID option will not be available if `is_for_embedded_signing` is set to true.
|
Please note that:
* When eID is enabled, the request can only be sent to one signer. Therefore, the signer cannot be re-ordered or reassigned.
* The Sender will get confirmation modal. Click "Enable" to confirm that eID will be required for this document.
## API
### Non-embedded
| Steps | Images |
| -------------------------------------------------------- | ------ |
| 1. Add `is_eid` on your request, with a value of `true`. | |
Supported endpoints:
* [Send Signature Request](/api/signature-request/send)
* [Send with Template](/api/signature-request/send-with-template)
### Embedded
| Steps | Images |
| ---------------------------------------------------------------------------------------------------------------------------------------------------- | ------ |
| 1. Set up an embedded request. See the [embedded request walkthrough](/docs/walkthroughs/embedded-requesting) for details. | |
| 2. When sending the initial API request, set the value of the `force_signer_roles` to `true`. This will enable the requester to see the signer step. | |
| 3. Inside the embedded iFrame, follow the instructions in the "Dropbox Sign Website" section above to enable eID. | |
| Supported endpoints: | |
* [Create Embedded Unclaimed Draft](/api/unclaimed-draft/create-embedded)
* [Embed Unclaimed Draft with Template](/api/unclaimed-draft/create-embedded-with-template)
Please note that:
* Using eID authentication on the API still only allows one signer.
* eID authentication cannot be used in `test_mode`.
* eID authentication does not support Embedded Signing. The Enable eID option will not be available if `is_for_embedded_signing` is set to true.